My previous post discussed the “hidden” menu in the SAP PI message mapping tool that can only be unlocked by pressing <Ctrl> + <Shift> while right clicking in the data flow editor area. Hands down, the best feature of this menu is the import/export functionality. I have no idea why the SAP developers buried such a useful feature in such a hard-to-find menu. Whatever the reason, now that we know that we can import and export message mappings, we can exploit this fact to make our map-developing lives easier.
Most SAP PI developers have had a situation where a relatively minor change to the target message causes real havoc to the entire message mapping. For relatively small maps, it may not be a big deal. For maps with complex logic, this can be a big deal requiring hours of tedious rework. Recently, I was faced with a requirement change that required my message mapping to change correlations from 1:1 to 1:N. Since this interface used the RFC adapter (which supports multiple messages), I was able to implement a 1:N multi-mapping message split. In the new interface design, the file adapter will process one file and pass it to the integration engine. The integration engine will perform a multi-mapping message split to break-up the message. The new, individual messages will be sent via one adapter engine call to the RFC adapter. The RFC adapter will handle each message individually, calling each in a separate logical unit of work (LUW).
The steps below will detail how to switch a message mapping from a 1:1 correlation to a 1:N correlation without remapping anything!
Note: The steps outlined below assume a moderate understanding of SAP XI/PI and gives does not give comprehensive instructions for every step. Please post any questions to the comments section of this blog.
- Step 1 Before starting anything, make a safe copy of your message mapping. This will give you the ability to perform before and after comparisons and afford you some protection if something were to happen to your original mapping
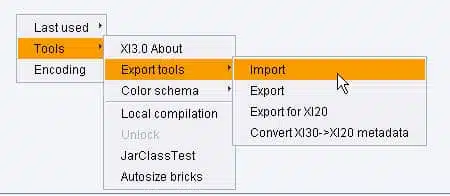
- Step 2 Use the hidden menu command (<Ctrl> + <Shift> + right click for those of you not paying attention) to download the current version of your message mapping. SAP PI will save a file with the extension .mte.

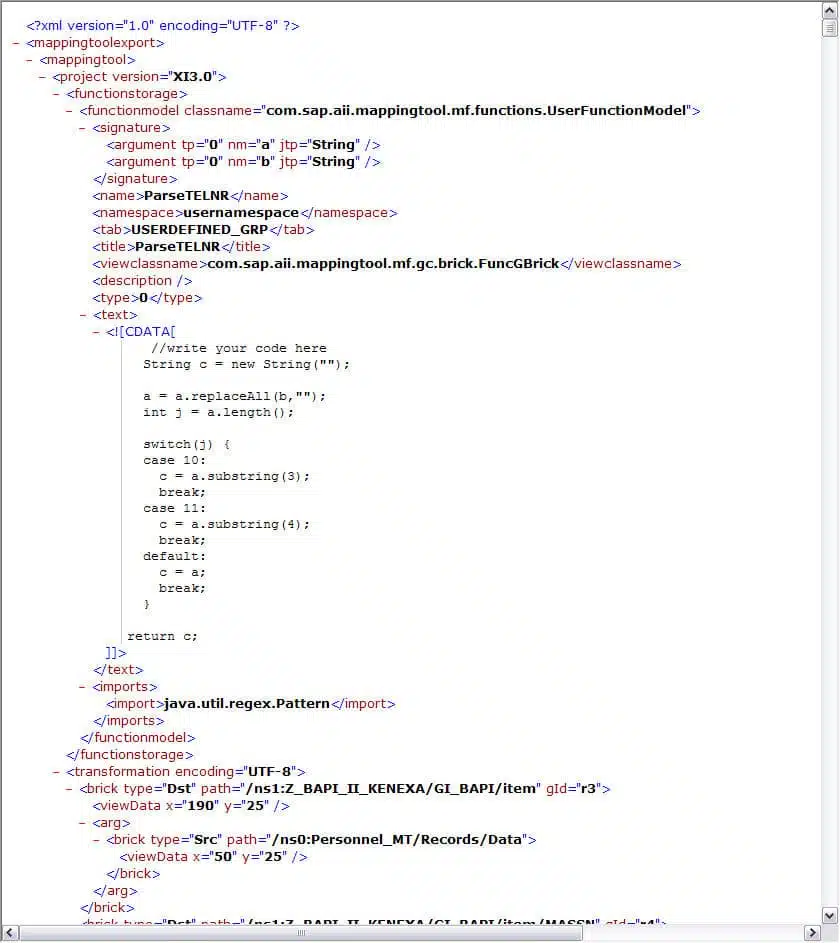
The .mte file you just exported is really just an XML file. Opening the .mte file in Internet Explorer will yield something that looks like this

The entire message mapping is contained in the file, including any user-defined functions, brick layout, and test cases. This will be very useful! - Step 2 Change the target occurrence in the message mapping. This is done on the Messages tab of the message mapping.

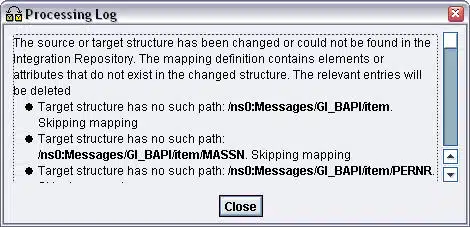
Changing the occurrence on the target message appears to have little effect on the message mapping, until you switch back to the Design tab and you see this ugly message box:

Oh noes! PI added <Messages> and <Message1> tags to the source and target messages! Since the target message structure changed, all of my hard-fought mappings are lost! Who can save me from hours of tedious remapping?
Fear not, plucky mapper, in a few steps, you can save the day by converting the entire map without remapping a thing! - Step 3 Use your favorite text editor to open the .mte mapping file. We will use the find/replace functionality to mass change the source mappings. You will need the services of the copy of the map you made in step 1. To get the value to find, copy the path of the root node in the unscathed map. To get the value to replace, copy the path of the node just below the <Message1> node in the new map.

Here is the find/replace text for the example in the graphic:Replace:
/ns0:Personnel_MT
with
/ns0:Messages/ns0:Message1/ns1:Personnel_MT - Step 4 Repeat step 3 for the target message.
Replace:Save the .mte file in the text editor
/ns1:Z_BAPI_II_KENEXA
with
/ns0:Messages/ns0:Message1/ns2:Z_BAPI_II_KENEXA - Step 5 Providing you didn’t inadvertently screw something up, you should be able to import the .mte file to the Integration Builder

- Step 6 Now change the occurrence on the corresponding interface mapping to match the message mapping occurrence set in step 2. Save and activate all of your changes.
- Step 7 The final step is to change the Interface Determination in the Integration Directory to utilize your new multi-mapping message split.
As you can see, the ability to export/import message mappings can really save you a lot of time. If you have any other tips regarding message mapping export/import, please share the in the comments.
Happy Mapping!!


Awesome information! Thanks
I have always liked to play with the xml mappingsfiles. And this is the easy way to switch root elements.
This feature is not available in PI 7.1, but it is possible to change top level element names.
/daniel
Hi,Gr88 blog but i have one doube here that why did you change occurence for both source and target in the text file when you wans to change just from 1: 1 to 1:N.From my understanding only changing target message type is enough.
As Daniel says, the feature is not available in PI 7.1.
You can export the XIM file, but it will not be possible to replace text as in MTE file.
There is an option to import a JAR file but it seems to be difficult to do anything useful with the byte code.
Would be interesting to know if anyone found a way to avoid having to remap everything with PI 7.1, if you want to add messages or even just change an std idoc with a quite similar z-idoc within a multi-message mapping.
A way to avoid having to remap everything with PI 7.1, if you want to add messages or even just change an std idoc with a quite similar z-idoc within a multi-message mapping is :
– Create a mapping template from the mapping you have created for an appropriate level in the message(s), and then reuse the template on the new set of messages.
1. THERE IS a nicer way to deal with structure changes in 7.1. When you see those messages that one or another node is not found in the structure, there appears a new button on the Message-Mapping’s toolbar: Correct Structural Inconsistencies. Press it and you will be suggested to select a field from the new structure for every missing field.
2. XIM file is a zip, actually. You can unzip it and get your hands on (almost) the same mapping definition in xml format.
3. Developers buried this functionality, because the management didn’t want to get into the hassle of officially supporting it. But developers needed it for debugging purposes and for dealing with customer problems. This import/export was developed before the export to xim file, which is superior.
Hi.
Great information. Thanks.
I’m search NetWeaver PI for download and install in my laptop, for home lab…
Anyones knows where is it… I cant find it in SDN SAP web site or in SERVICE SAP web site.
Thanks in advance.
Patricio Paiva
What is the need of using message type during mapping rather than using data type in SAP PI
Hi, Craig…
PI 7.4.
I can not complete the steps above. Can you help me?
Hi, Andrey, you can refer “Repairing Target-Field Mappings After Structure Changes” in
http://help.sap.com/saphelp_nw74/helpdata/en/4b/f41787eaca4c86e10000000a42189e/frameset.htm
Backdoor access will usually eventually close at some point in time. This is true in this case. This functionality described in this blog to export/import map has been removed a while back in PI 7.1.
However, new functionality was also introduced that was added at or around the same time to accomplish the task described in the blog. Its called “Correct Structural Inconsistency”.
Let me explain how to use it.
In the ESR, At the moment you change the target mapping from (1:1) to (1:unbounded) your mapping will basically bomb on all the previous mapping you have done. You should also notice a new (Yellow Exclamation) Icon in your mapping. This is found right under the 4 tabs for (Definition/Test/Signature/Functions).
Once you click ! Icon, it will display your original target field with the option to choose your new target field. In most cases you will just need to click the ‘MOVE’ button. This will essentially reassign your original mapping to the correct lower level node. You may have to press the ‘MOVE’ button more than once depending on how deep your original structure is. Once you complete this task, you will now see all of your previous mapping reassigned successfully to the map. Enjoy…..